Get Started: Creating Your First Workflow
Welcome to CAD Workflow Manager! This guide will walk you through creating your first workflow - a simple "Hello World" example that opens a SolidWorks file. This tutorial demonstrates the basic workflow creation process and introduces you to the workflow editor interface.
Overview
In this tutorial, you will learn how to:
- Navigate to the Workflow Definitions page
- Create a new workflow
- Name your workflow
- Add activities to your workflow
- Configure activity properties
- Run your workflow
What We're Building
We'll create a simple workflow named "Hello World" that uses the OpenSolidWorksFile activity to open a SolidWorks file. This is a fundamental workflow that demonstrates the core concepts of workflow creation in CAD Workflow Manager.
Step-by-Step Instructions
1 Open the Workflow Definitions Page
- Launch CAD Workflow Manager
- In the left navigation menu, click on "Toggle Workflows" to expand the Workflows section
- Click on "Definitions" to navigate to the Workflow Definitions page
You should now see the Workflow Definitions page with a list of existing workflows (if any) and a toolbar at the top.
2 Create a New Workflow
- Click the "CREATE WORKFLOW" button in the toolbar
- A new workflow editor will open with an empty canvas
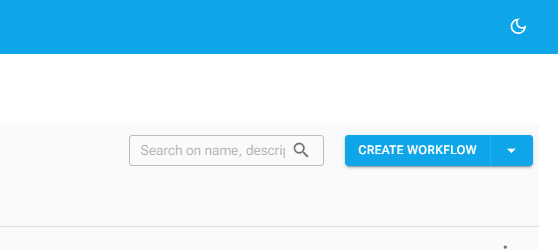
Figure: The Create Workflow Button
3 Name Your Workflow
- Click in the workflow name field (typically at the top of the canvas or in the properties panel)
- Type
Hello Worldas the workflow name - Press Enter or click outside the field to save
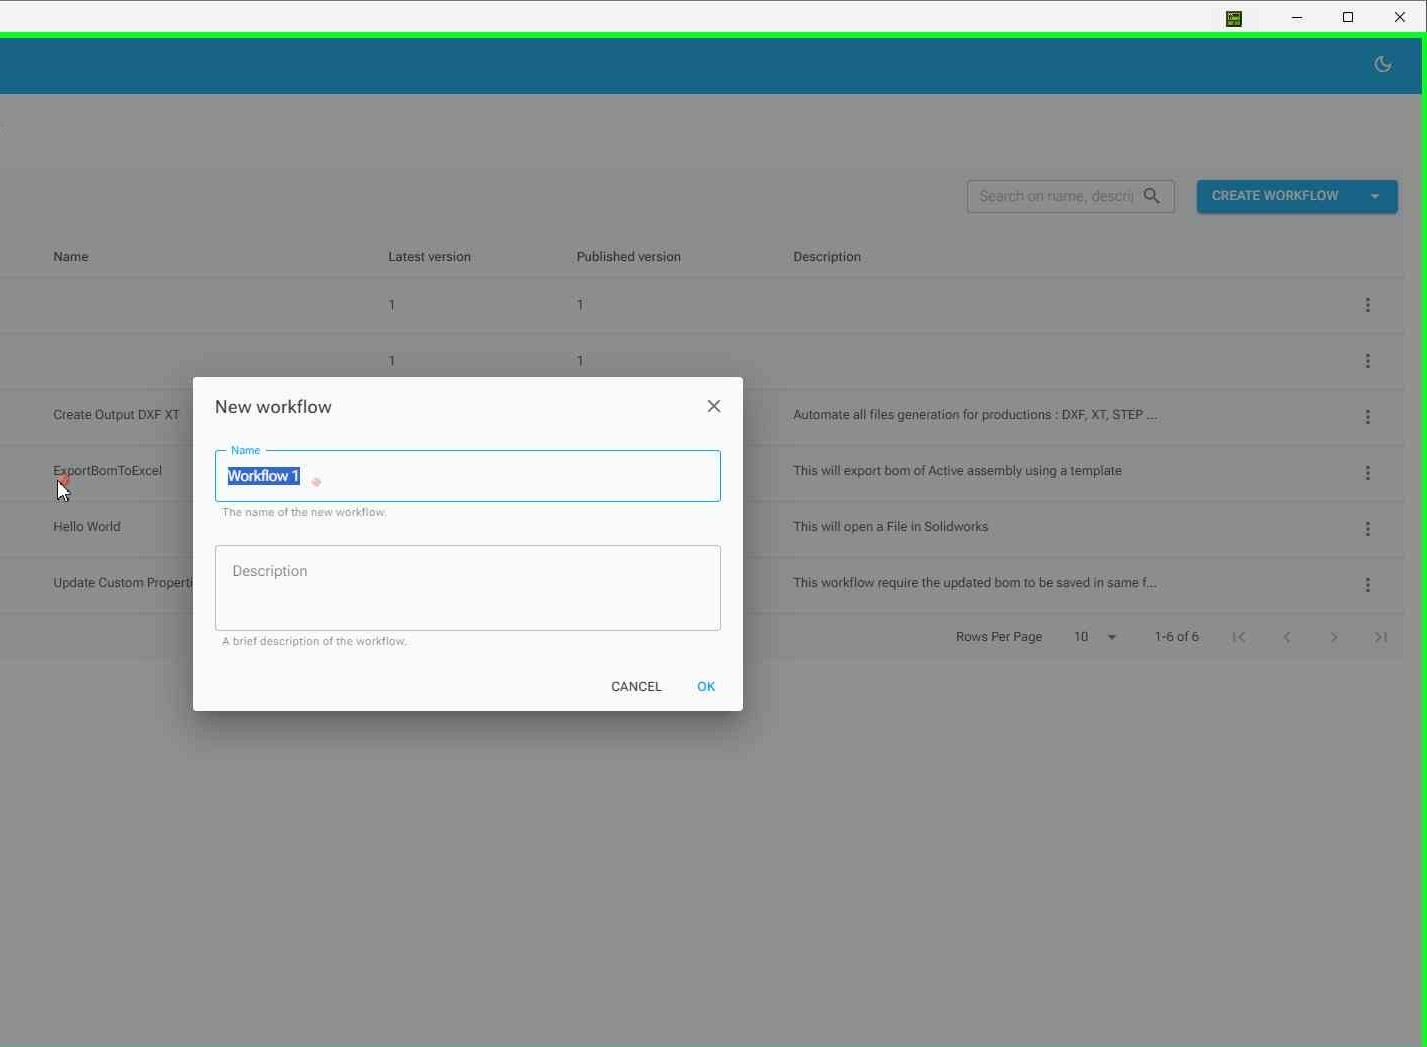
Figure: Entering the workflow name
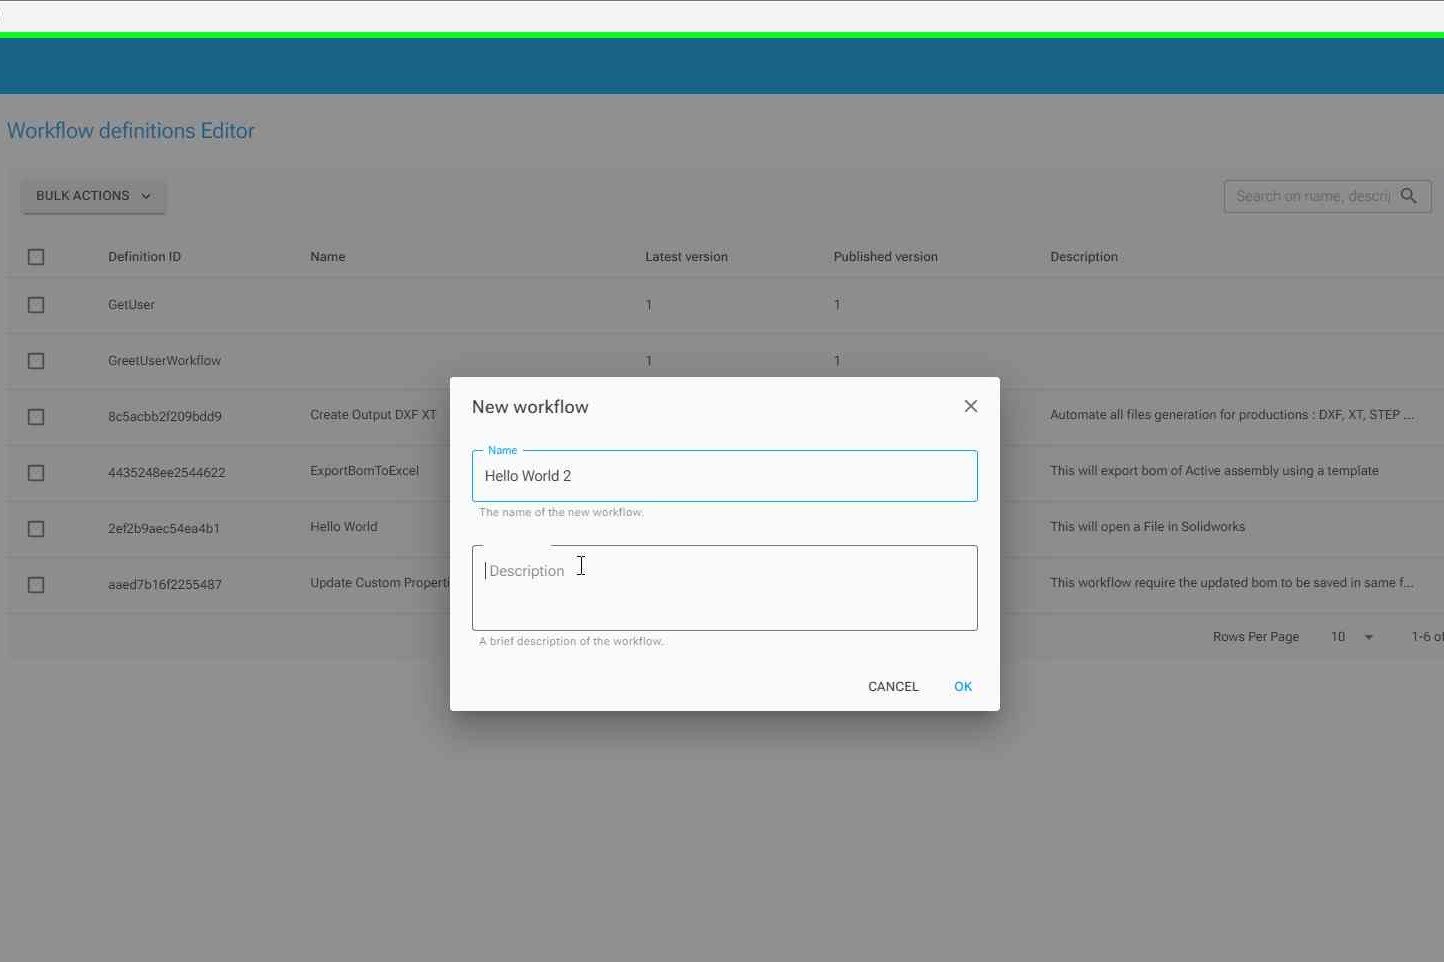
Figure: Workflow name saved
Understanding the Workflow Editor
The workflow editor consists of three main areas:
- Left Panel: Activity browser - Browse and search for activities to add to your workflow
- Center Panel: Workflow canvas - Drag and drop activities here to build your workflow
- Right Panel: Properties panel - Configure selected activities
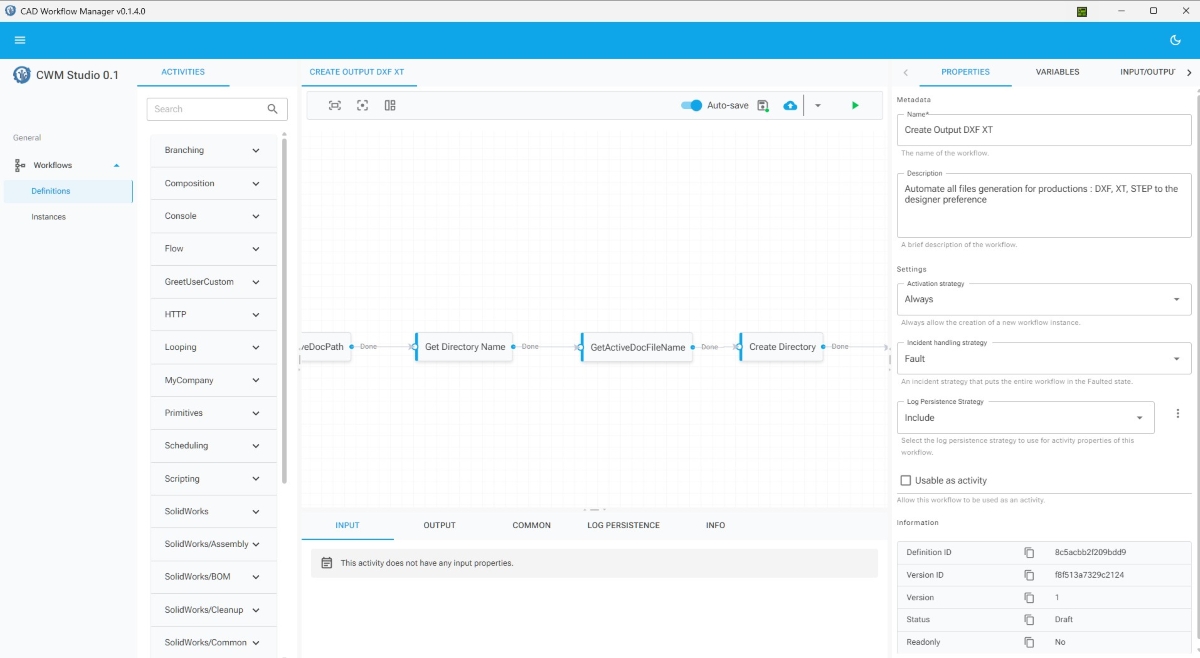
Figure: The workflow editor interface with activity browser, canvas, and properties panel
4 Add the Start Activity
Every workflow needs a Start activity to mark the beginning of execution. Let's add it first.
- In the left activity browser panel, expand the "Flow" category
- Locate the "Start" activity in the Flow category
- Click and drag the "Start" activity from the browser onto the workflow canvas
- Drop it on the canvas
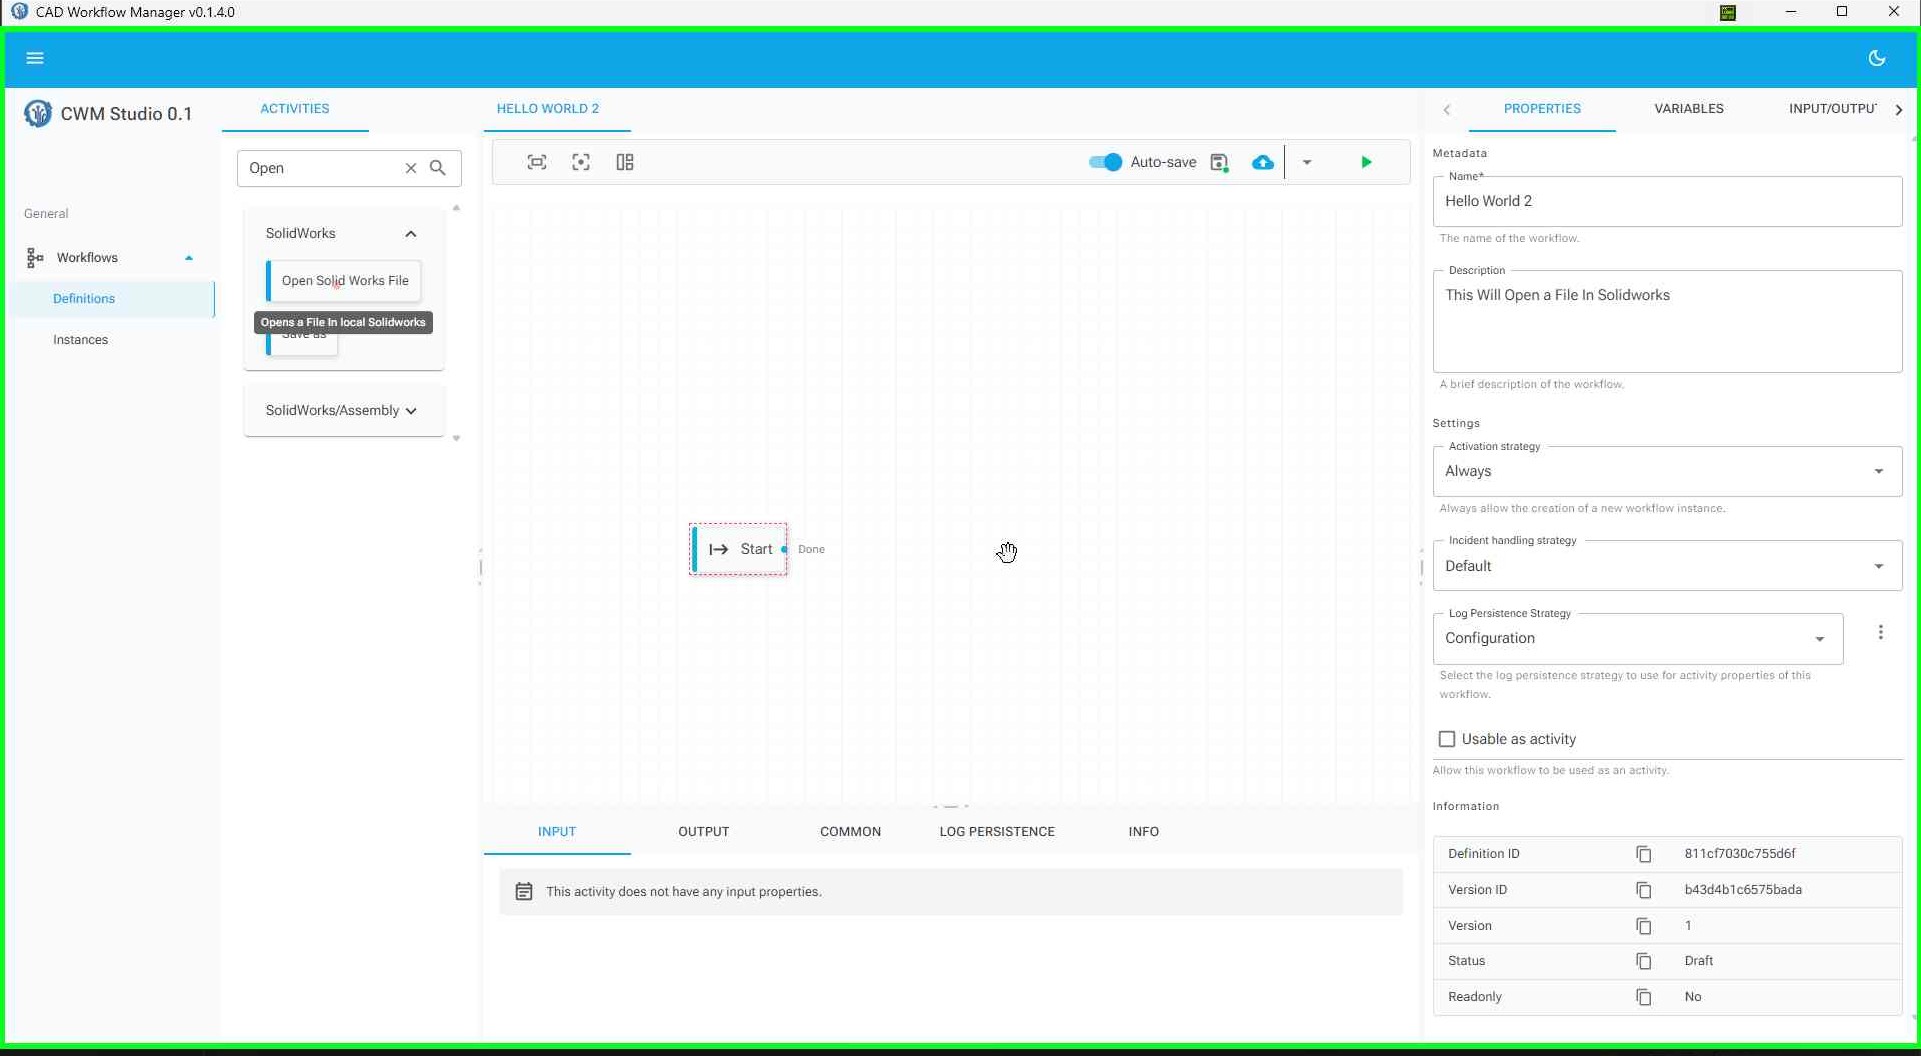
Figure: The workflow editor with activity browser - locate the Flow category
Once the Start activity is on the canvas, you'll see it as a node. This is where your workflow execution will begin.
5 Add the OpenSolidWorksFile Activity
Now let's add the SolidWorks activity that will open a file. This activity will be connected to the Start activity.
- In the left activity browser panel, expand the "SolidWorks" category
- Expand the "SolidWorks/Common" subcategory (or navigate to "SolidWorks/Common" for the OpenSolidWorksFile activity)
- Locate the "Open Solid Works File" activity
- Click and drag the activity from the browser onto the workflow canvas
- Drop it on the canvas near the Start activity
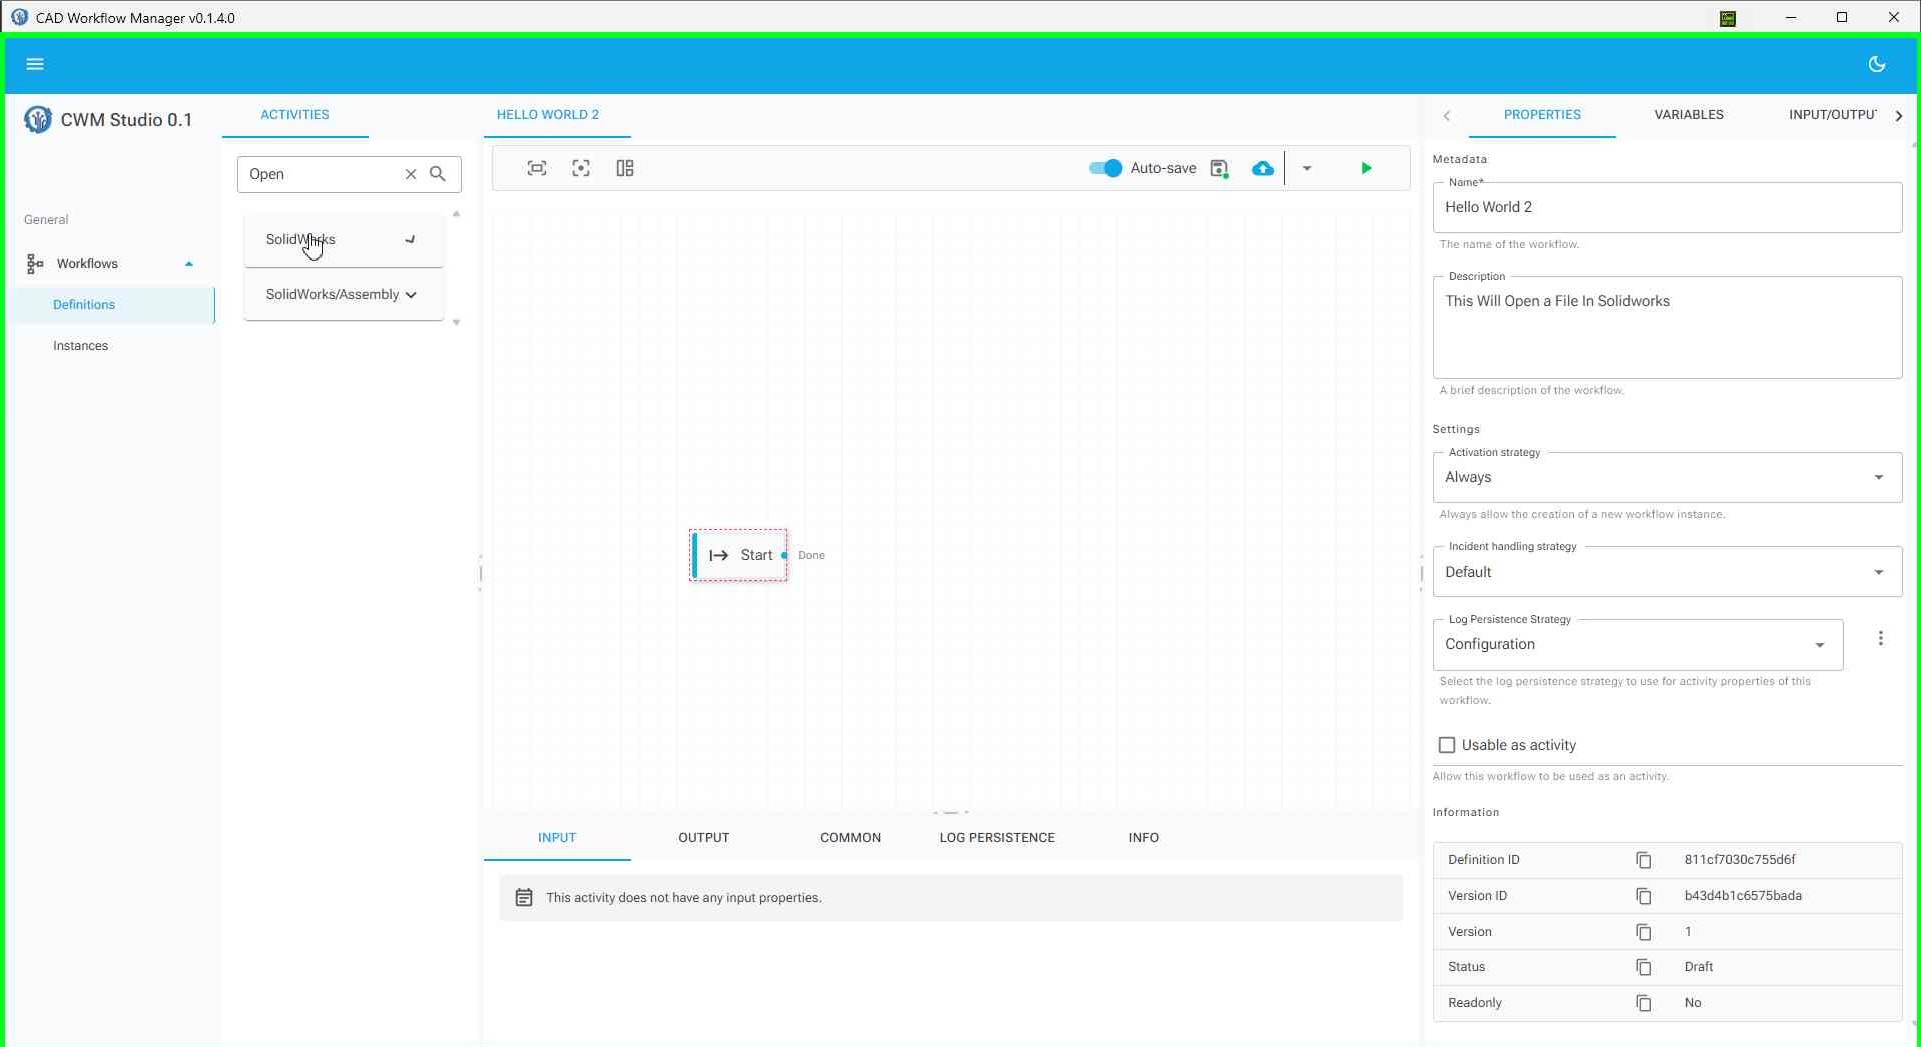
Figure: Expanding the SolidWorks category in the activity browser
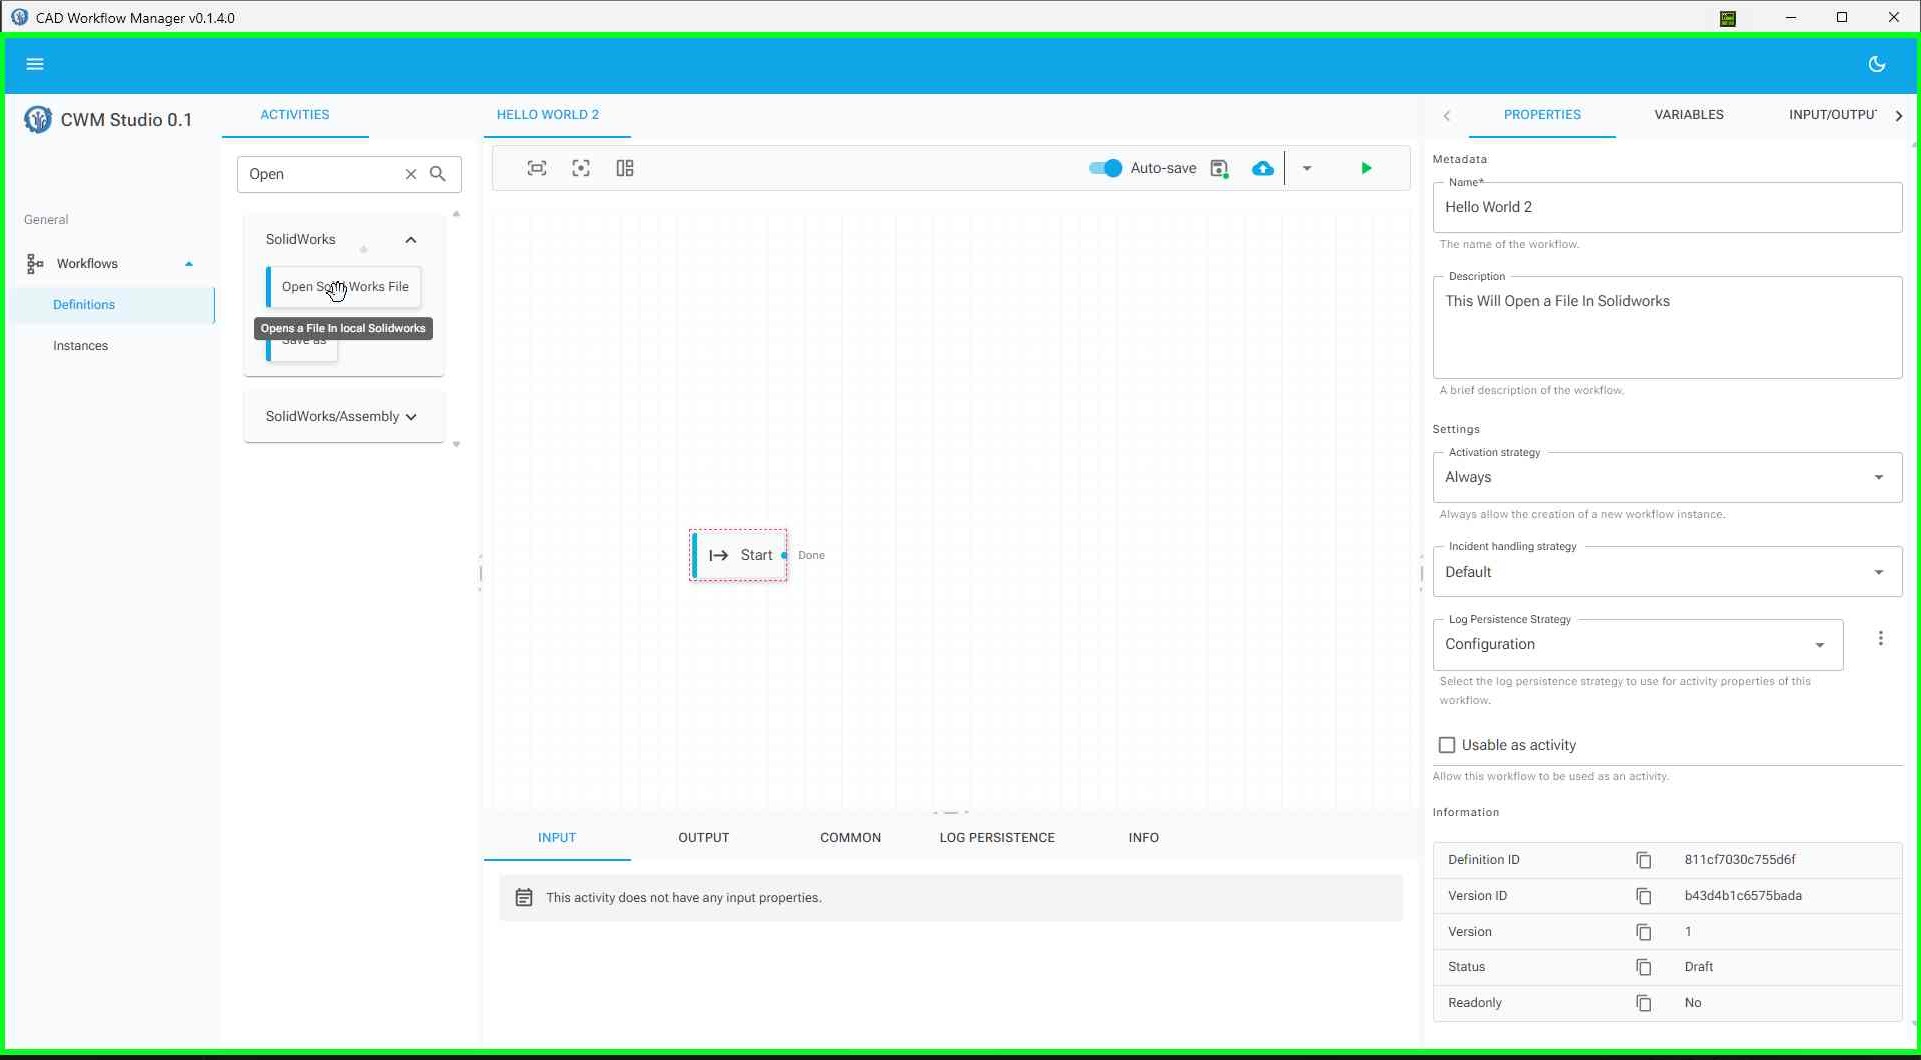
Figure: Dragging the OpenSolidWorksFile activity from the activity browser
Figure: Activity successfully added to the workflow canvas
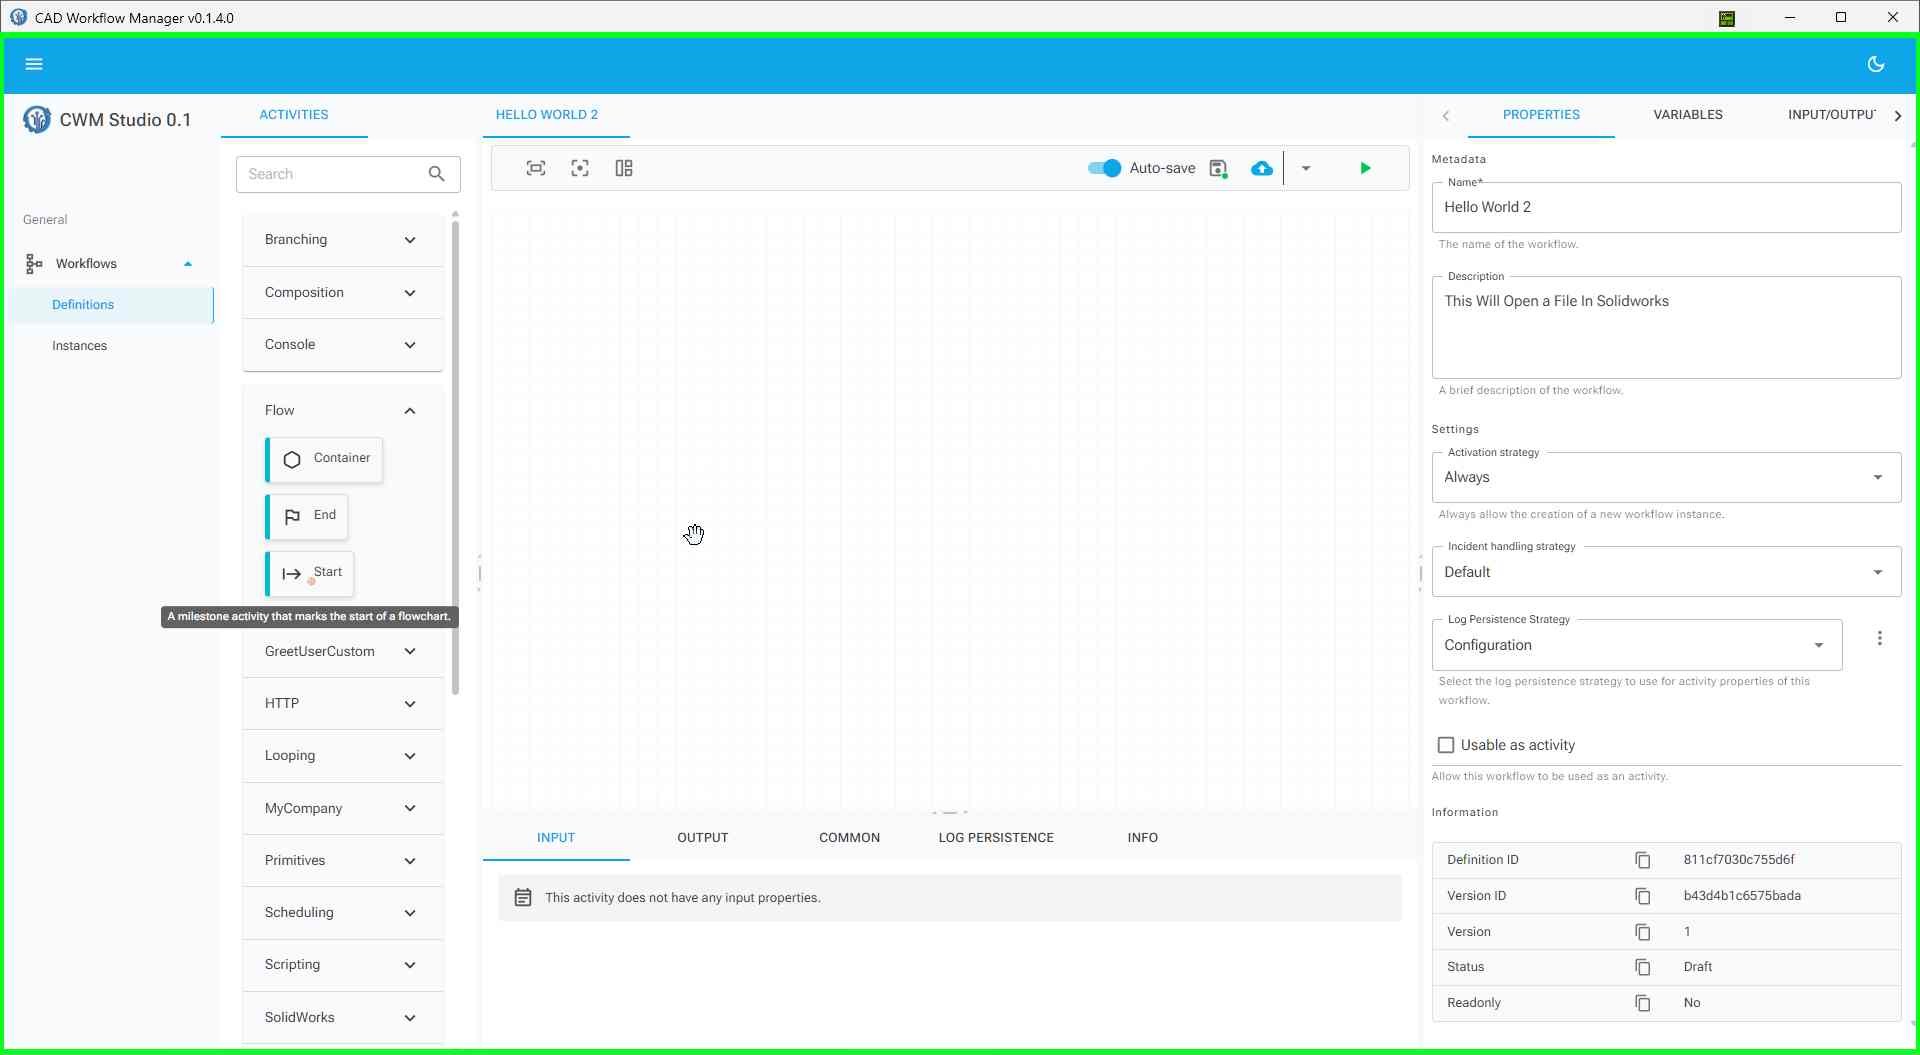
Figure: Both Start and OpenSolidWorksFile activities on the canvas
The activity will appear as a node on the canvas. You can click and drag it to reposition it as needed. The Start activity should be connected to the OpenSolidWorksFile activity to create a flow.
6 Configure the Activity
- Click on the "Open Solid Works File" activity node on the canvas to select it
- The properties panel on the right will show the activity's configuration options
- In the FilePath property field, enter the full path to a SolidWorks file you want to open
- For example:
C:\Projects\MyPart.SLDPRT
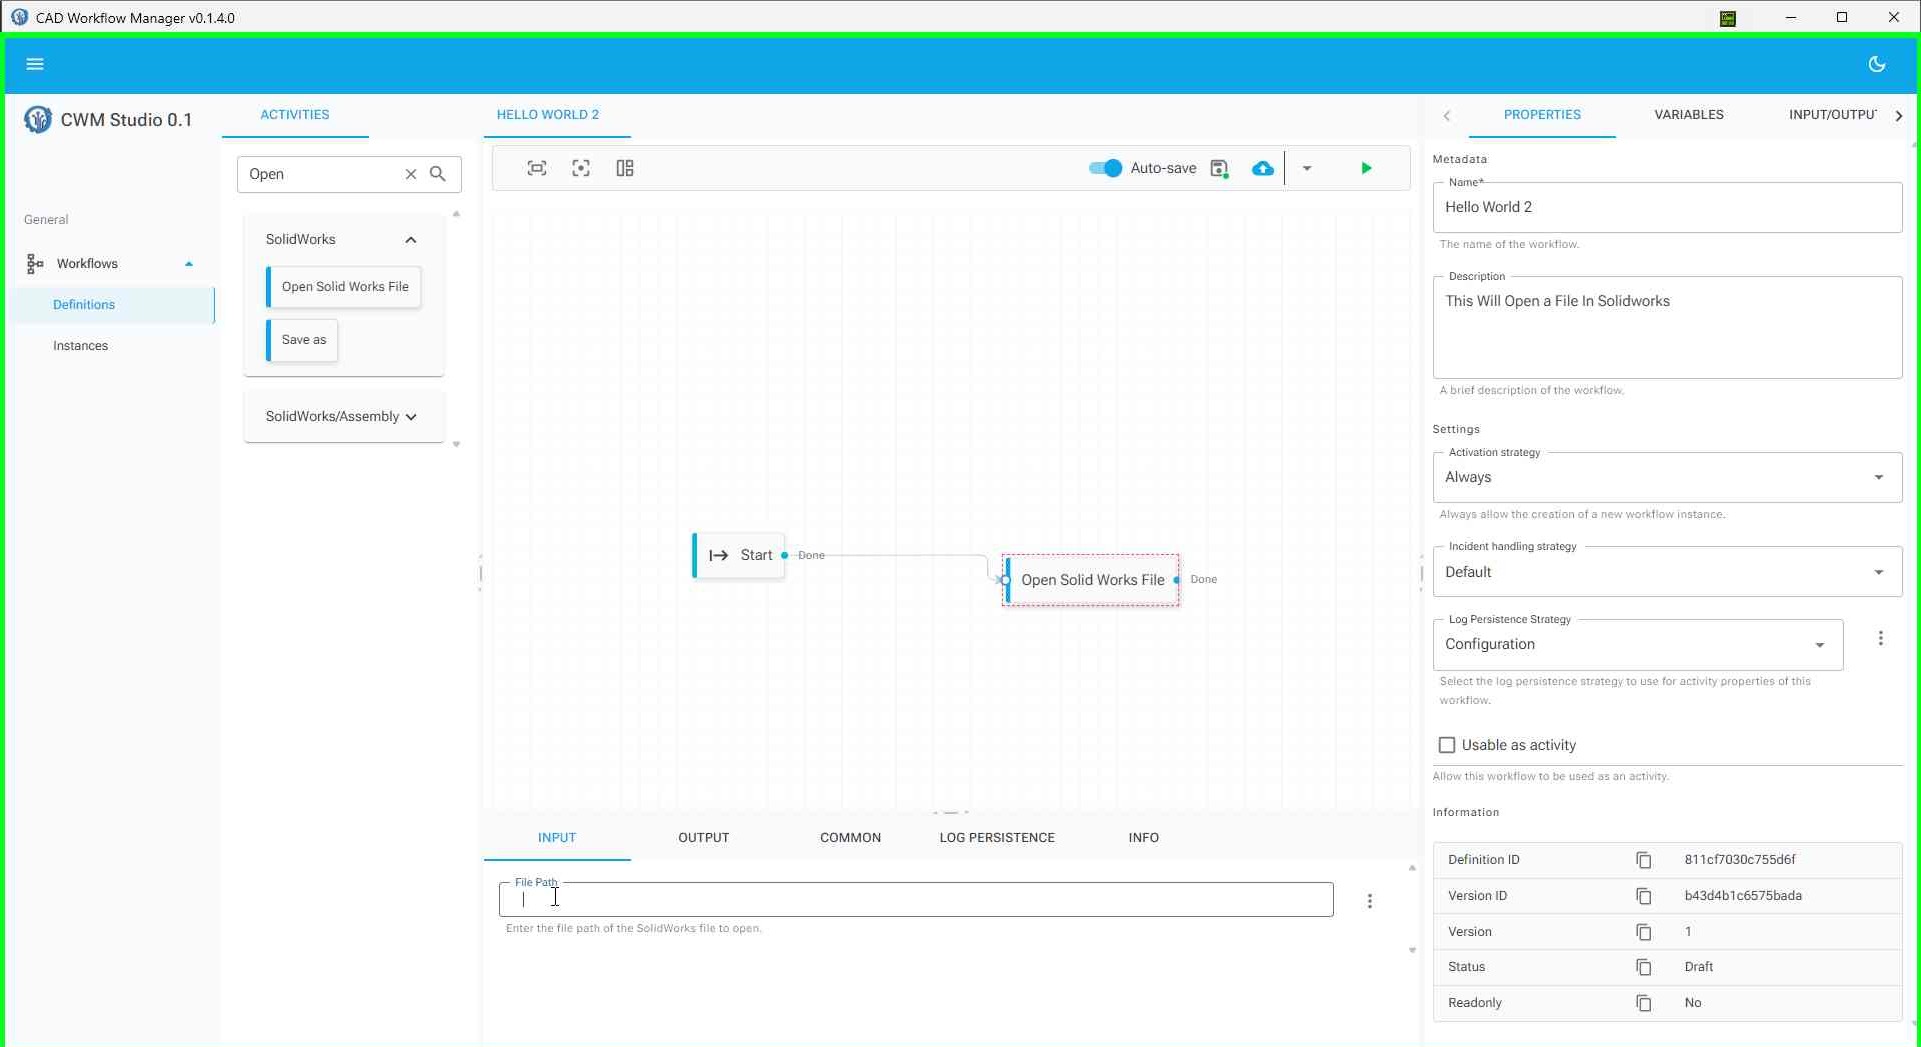
Figure: Selecting the activity to view its properties panel
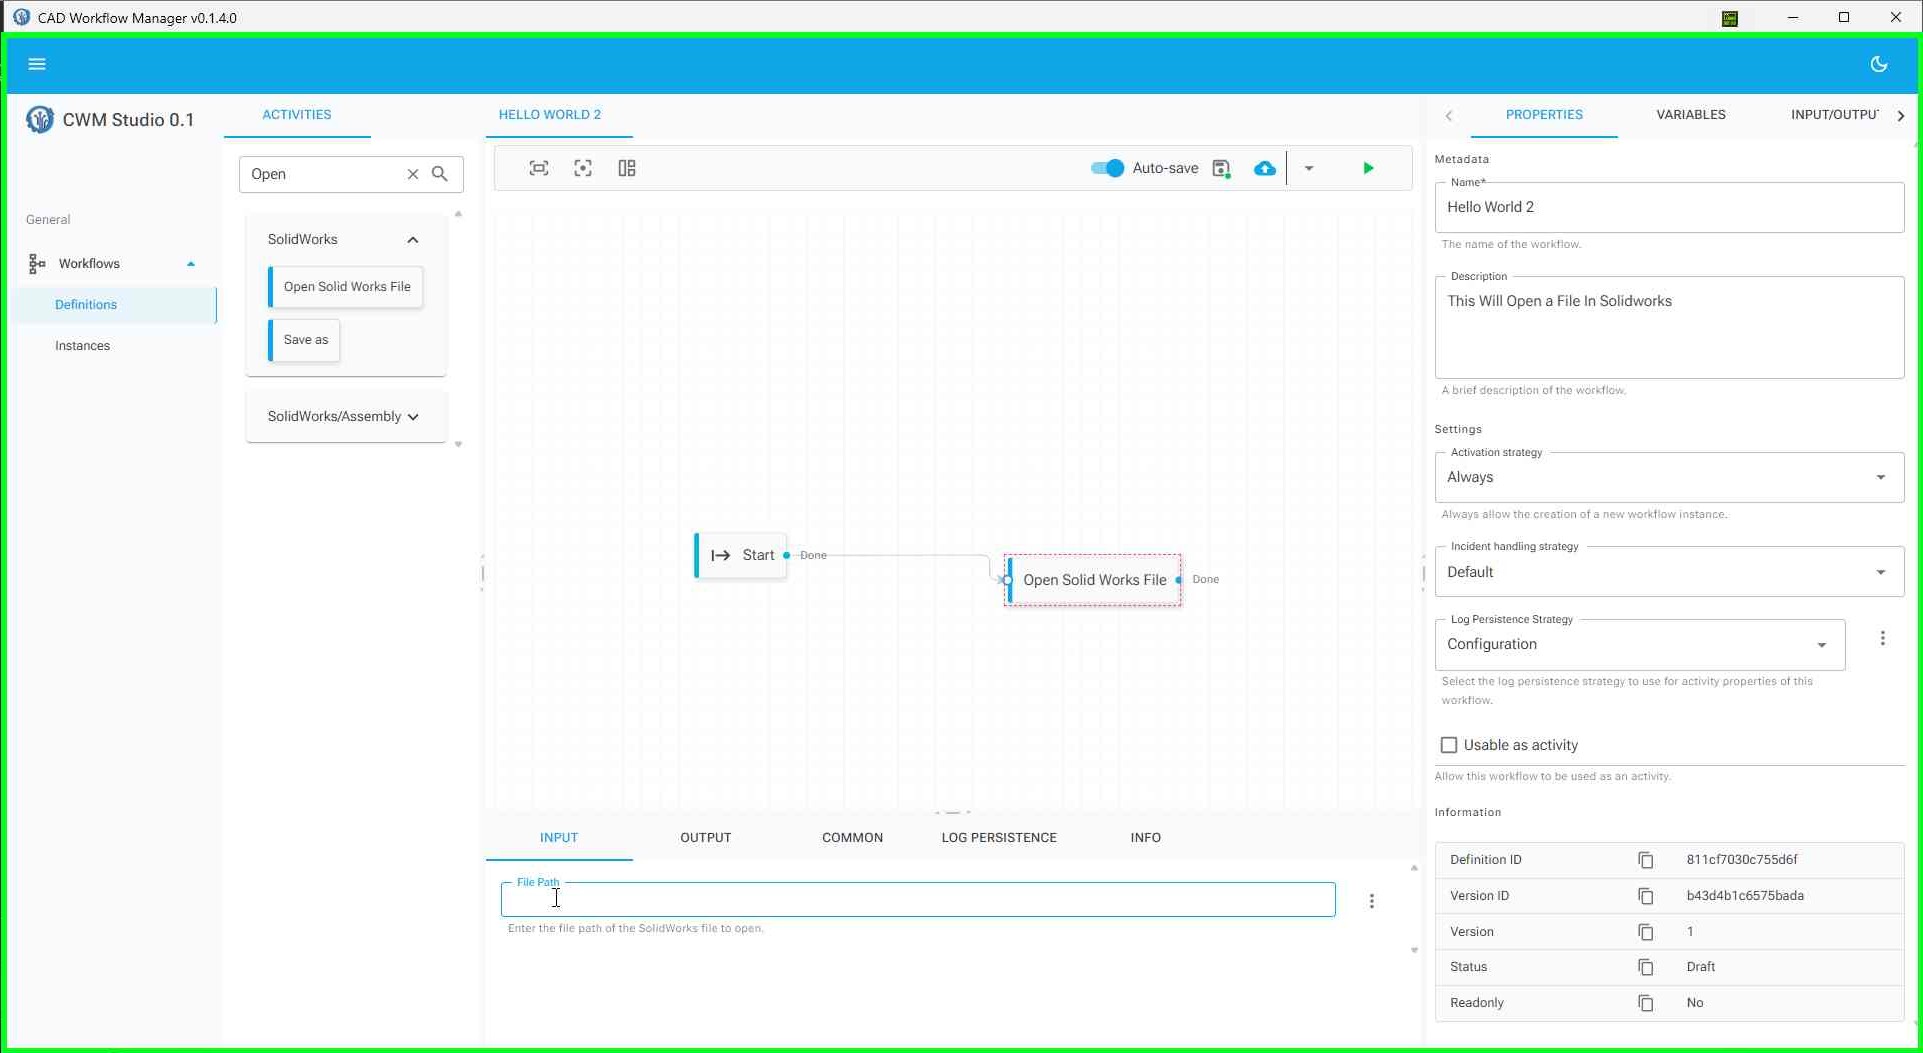
Figure: Properties panel with configuration fields
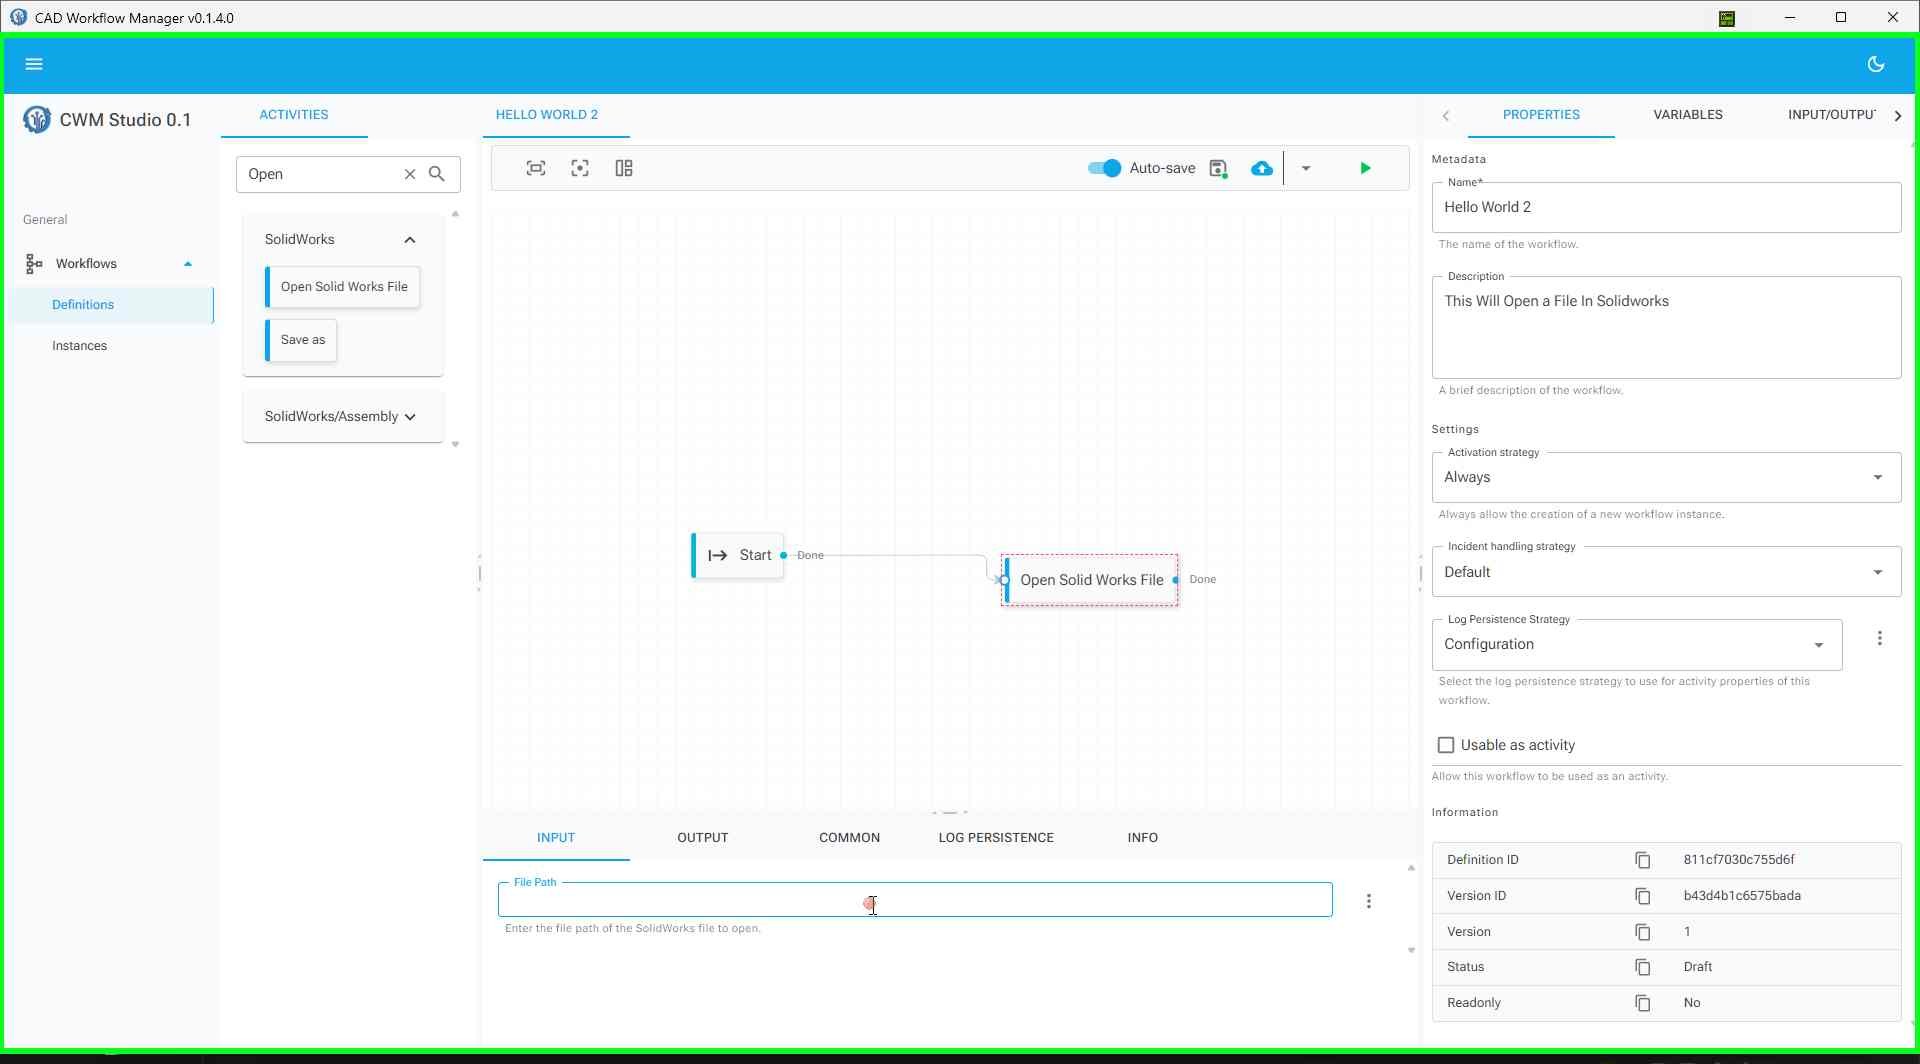
Figure: Entering the file path in the FilePath property
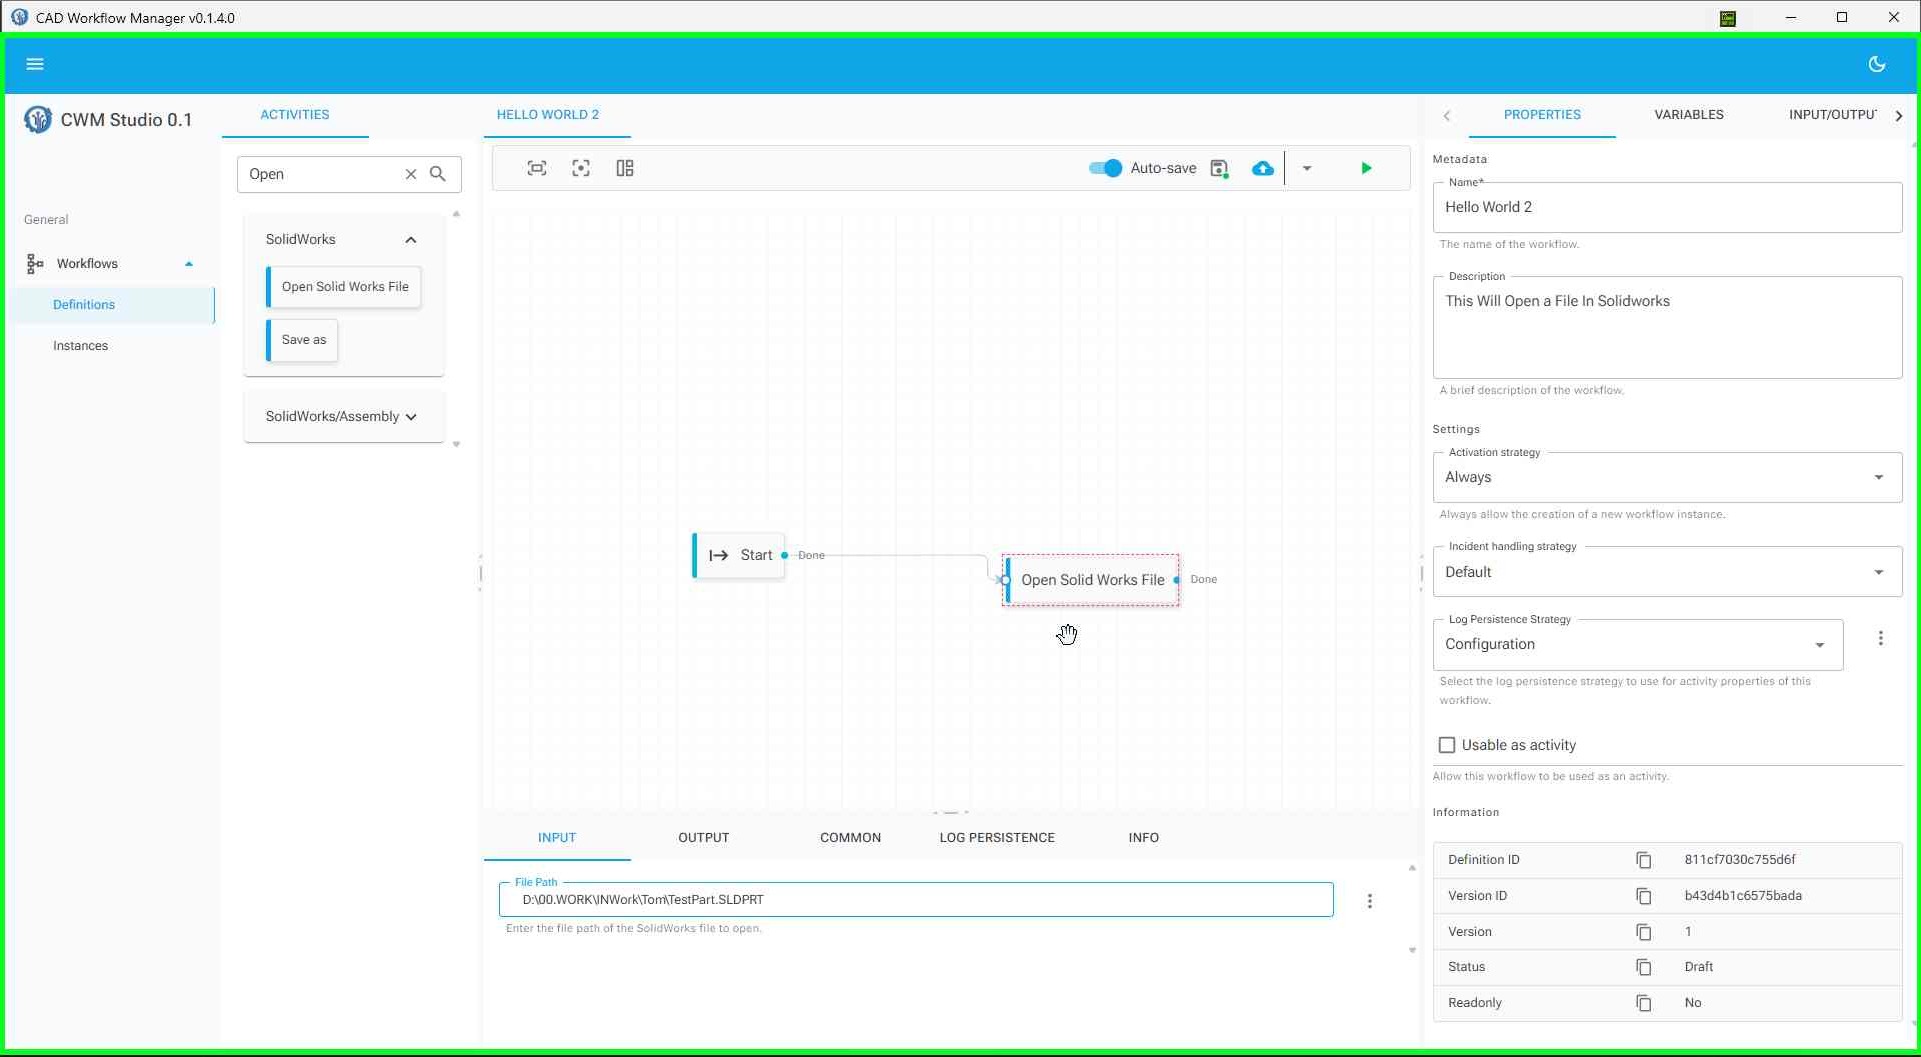
Figure: File path successfully configured
Required Property:
- FilePath: The full path to the SolidWorks file you want to open (e.g.,
C:\Projects\MyPart.SLDPRT)
Output:
- DocumentId: Returns a unique document identifier (GUID) that can be used to reference the opened document in subsequent activities
Understanding DocumentId
What is DocumentId?
The DocumentId is a unique identifier (GUID) that CAD Workflow Manager assigns to each SolidWorks document when it's opened or accessed. Think of it as a "handle" or "reference" to the document that allows other activities to work with the same document.
What Activities Register/Output DocumentId?
The following activities output a DocumentId that you can use in subsequent activities:
- OpenSolidWorksFile - Opens a file and returns its DocumentId
- GetActiveDoc - Gets the currently active SolidWorks document and returns its DocumentId
What Activities Require DocumentId as Input?
Many SolidWorks activities require a DocumentId to know which document to operate on. Examples include:
- Save - Saves the document specified by DocumentId
- SaveAs - Saves the document with a new name
- GetFullPath - Gets the full file path of the document
- ExtractCustomProperties - Extracts custom properties from the document
- AddOrUpdateCustomProperty - Updates custom properties in the document
- GetVolume, GetSurfaceArea, ExtractPartData - Various part analysis activities
- And many more SolidWorks activities...
How to Use DocumentId in Your Workflow:
- When you configure the OpenSolidWorksFile activity, it outputs a
DocumentId - You can connect this output to other activities that need a
DocumentIdinput - In the workflow editor, you can reference the DocumentId from the previous activity using variable expressions like
{OpenSolidWorksFile.DocumentId} - This allows you to chain multiple operations on the same document
7 Save Your Workflow
Your workflow is automatically saved as you work. However, you can manually save by:
- Clicking the Save button in the toolbar (if available)
- Or using the keyboard shortcut Ctrl+S
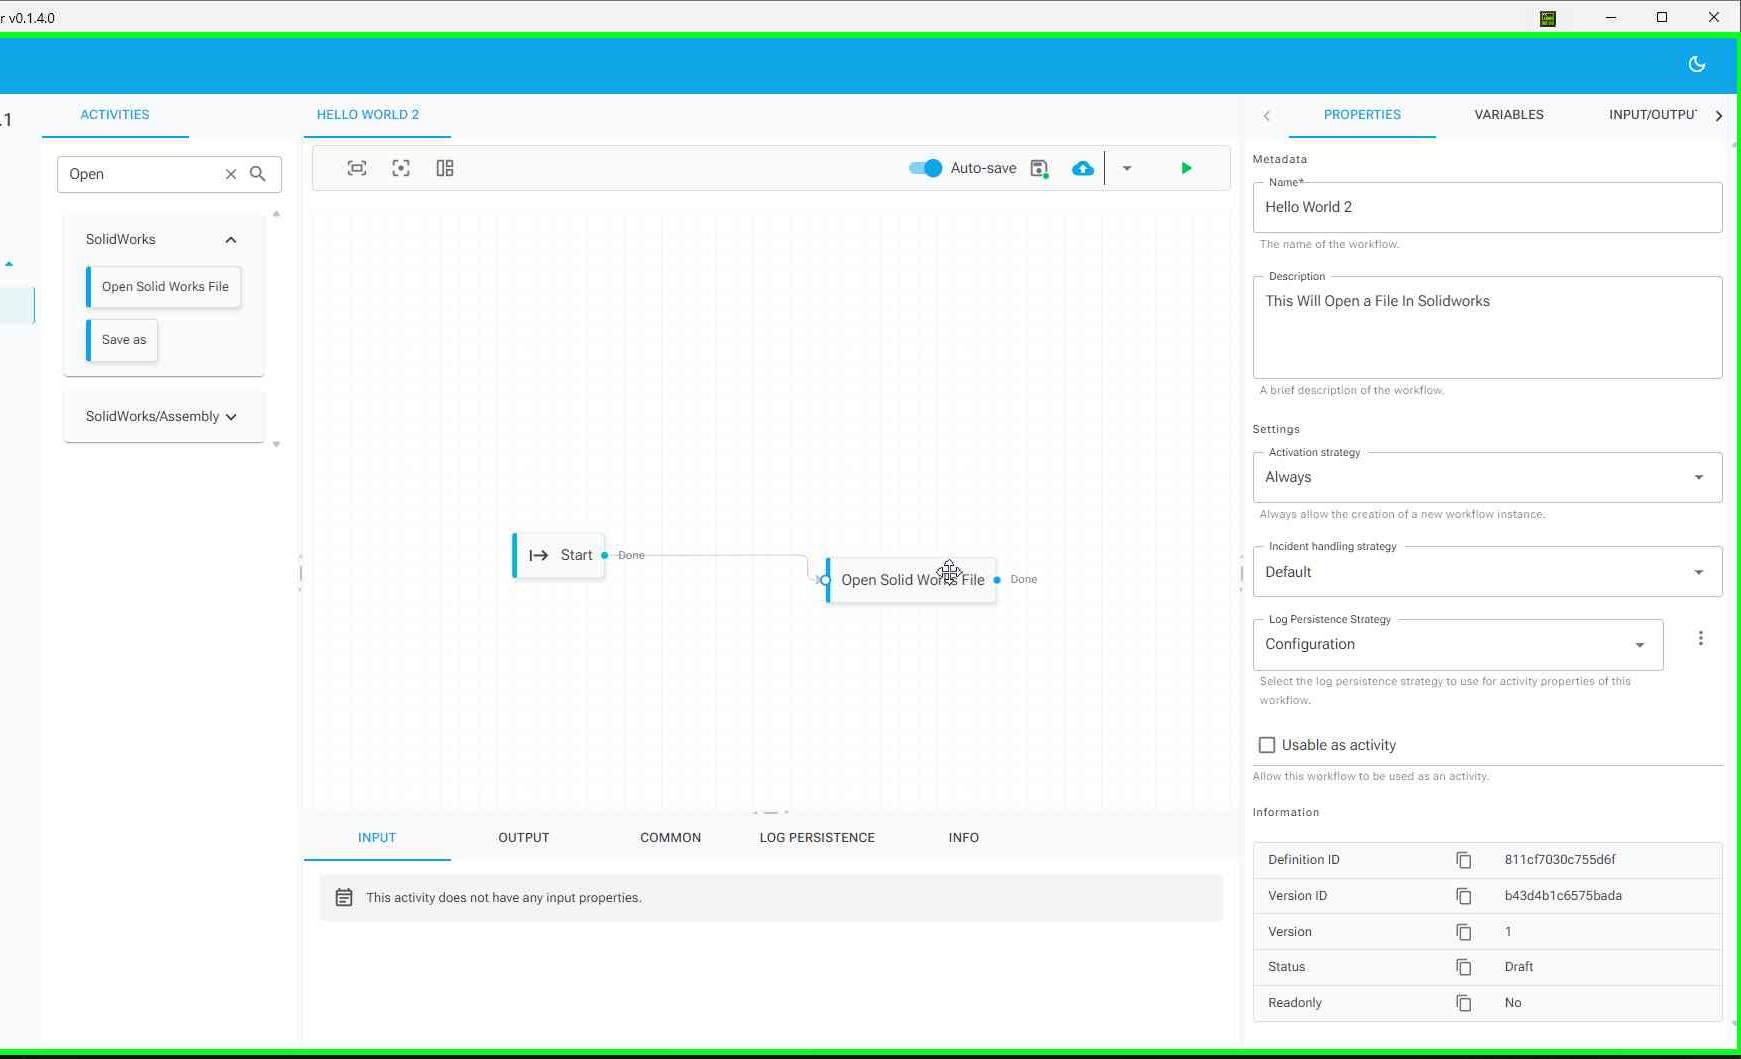
Figure: Completed workflow ready for execution
8 Run Your Workflow
- Click the "Run workflow" button in the toolbar
- The workflow will execute and attempt to open the specified SolidWorks file
- If SolidWorks is not already running, it will be launched automatically
- The file will open in SolidWorks
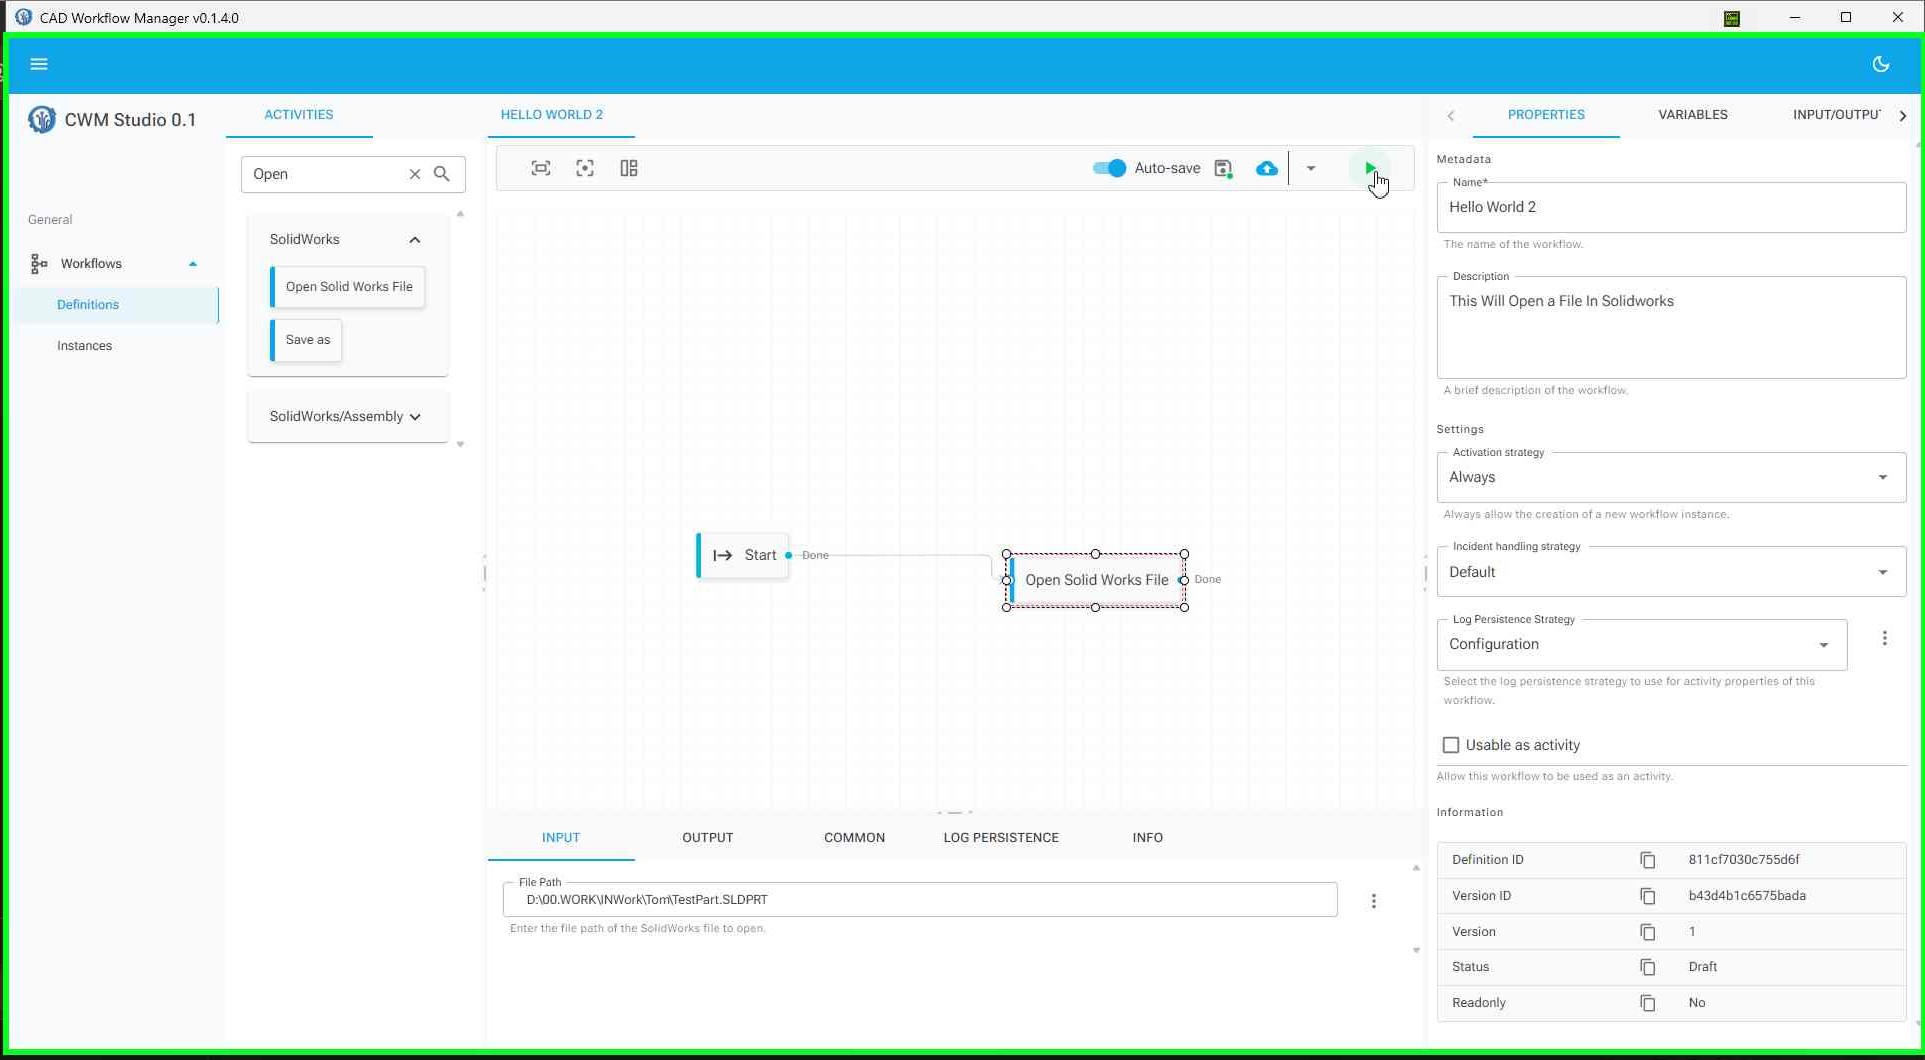
Figure: Running the workflow
What's Next?
Congratulations! You've created your first workflow. Here are some next steps to explore:
- Add More Activities: Try adding additional activities to your workflow, such as:
- Save - Save the opened document
- GetActiveDoc - Get information about the active document
- ExtractCustomProperties - Extract custom properties from a part
- Connect Activities: Learn how to connect activities to create more complex workflows
- Use Variables: Explore how to use variables to pass data between activities
- Add Conditions: Use branching activities like If or Switch to add logic to your workflows
Common Issues and Solutions
File Not Found
Problem: The workflow fails with a "file not found" error.
Solution: Verify that the file path is correct and the file exists. Use absolute paths (full path starting with drive letter) rather than relative paths.
SolidWorks Not Opening
Problem: SolidWorks doesn't open when the workflow runs.
Solution: Ensure SolidWorks is installed and properly licensed. Check that the SolidWorks installation path is correct in your system settings.
Activity Not Found
Problem: Can't find the OpenSolidWorksFile activity in the browser.
Solution: Make sure you're looking in the correct category. The OpenSolidWorksFile activity is located under SolidWorks → Common in the activity browser.
Related Documentation
- Start Activity Help - Learn about the Start activity that marks the beginning of workflows
- OpenSolidWorksFile Activity Help - Detailed documentation for the OpenSolidWorksFile activity
- GetUserInput Activity Help - Learn how to get user input during workflow execution
Summary
In this tutorial, you learned how to:
- Navigate to the Workflow Definitions page
- Create a new workflow
- Name your workflow "Hello World"
- Add the Start activity to mark the beginning of your workflow
- Add the OpenSolidWorksFile activity to your workflow
- Configure the activity with a file path
- Run the workflow to open a SolidWorks file
This basic workflow demonstrates the fundamental concepts of workflow creation in CAD Workflow Manager. As you become more familiar with the system, you can build more complex workflows that automate multiple CAD operations.
Need Help? If you encounter any issues or have questions, refer to the activity-specific help documentation or contact your system administrator.